Saturday 30 April 2011

Another Prop: Deer Skulls


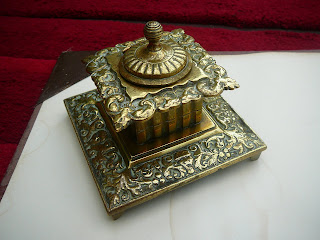
After studying the drawings from 'Corpse Bride' I noticed that the presence of antlers and skulls mounted on the walls of the room resulted in morbid dark gothic style that would be very appropriate for the study (skulls illude to death very boldly) I started off by looking through books of various deer varieties and found that the Roe Deer (which is very common around Britian) is also very common across most of Europe including Russia, so would have most likely been the deer mounted on Ivan's wall. Red deer are also common but Roe deer skulls were easier for me to locate.

I started off by making some observations from the referance books on deer antlers, size and age etc also looking at the skull shapes.


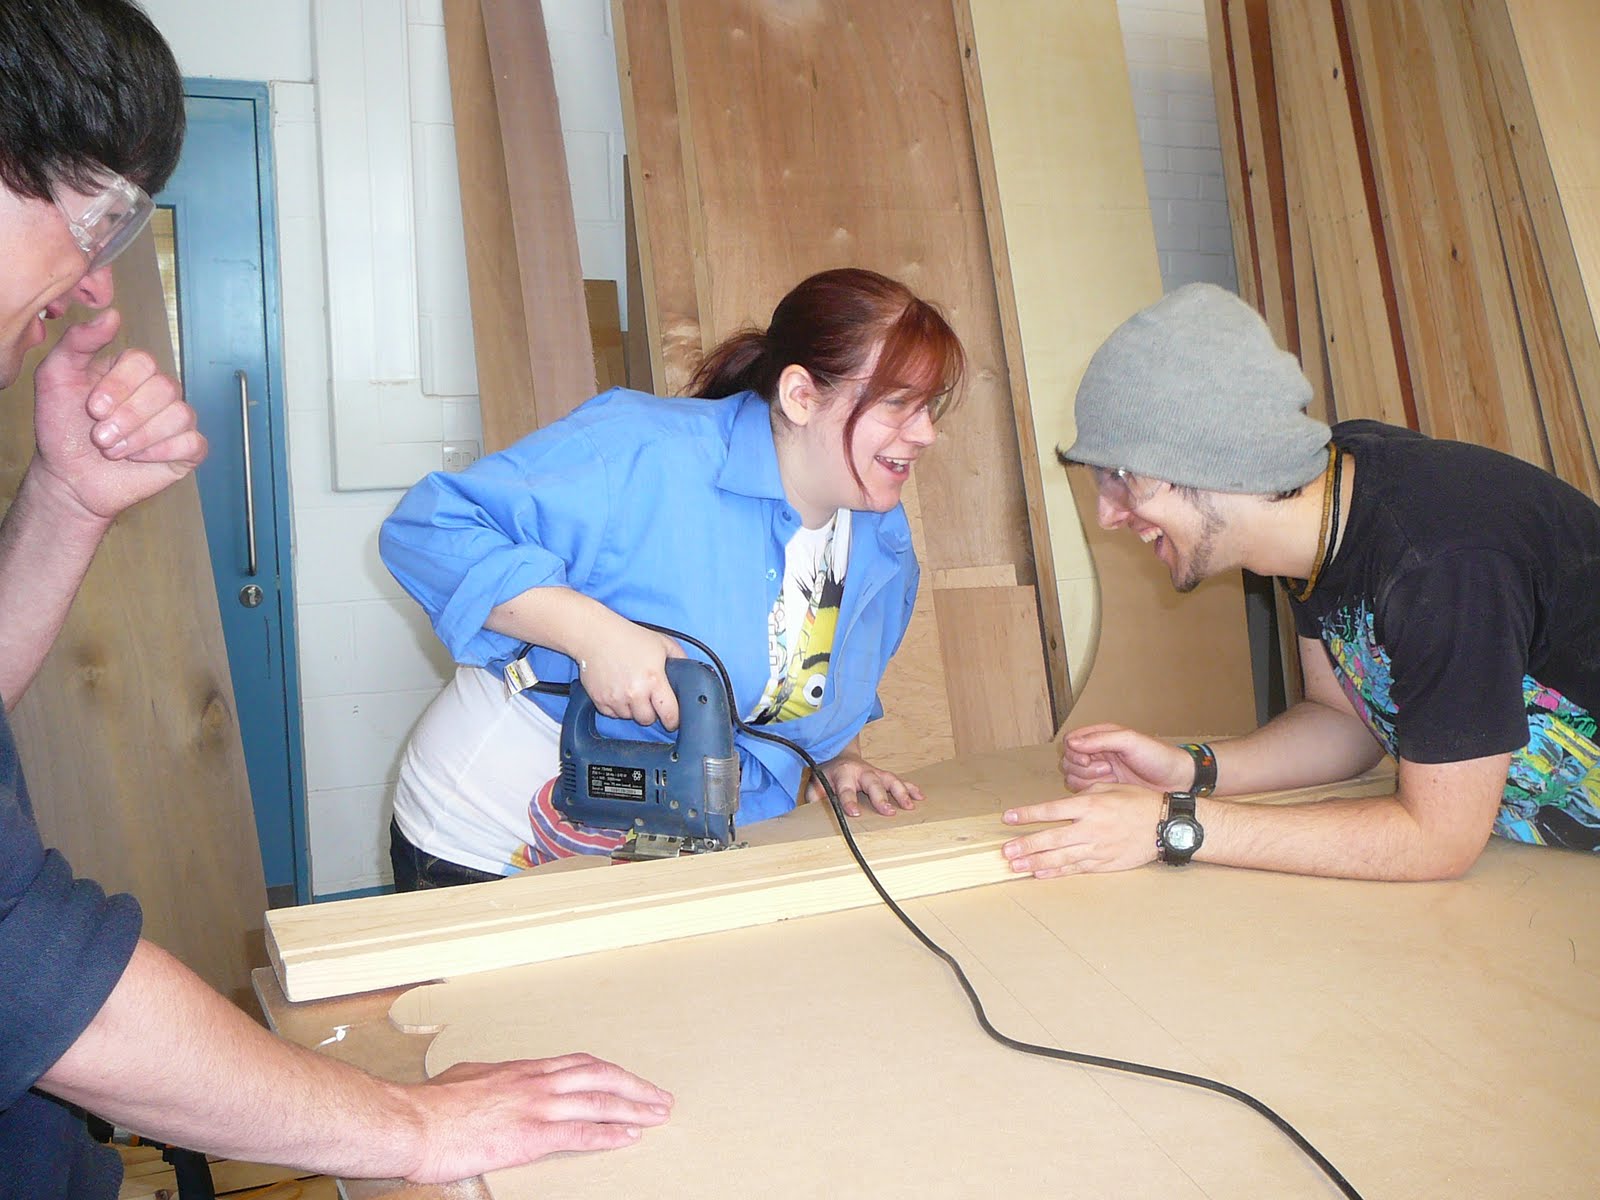
I managed to get hold of three Roe deer skulls from my uncle who was a game keeper. He also tutored me in the best way to mount them to a wooden shield. I offered the question to the group whether they wanted me to mount them all on one shield or on individual shields. More interest seemed to direct to them all being on the same one, so I made a template out of card then marked this up on thin MDF. The MDF was cut using a jigsaw and then the edges were sanded with a mouse sander (I made this at home and unfortunatly did not have a router). To gain a similar effect as a router I cut another shield 1cm smaller around the edge that was then evosticked onto the base shield. By lining the skulls onto the MDF I marked their position and drilled the three necessary holes. It was important to drill the wood screw into the central part of the skull as this was the thickest area of dense bone and would be less likely to split and chip. I removed the skulls and then gave the shield two thick coats of dark oak stained varnish leaving the surface looking like a more expensive darker wood rather than MDF. The skulls were then screwed back onto the shield tightly to avoid scratching the varnish, Then mounted two mirror fixing plates to the back that would allow us to easily hang them to the walls.

Wednesday 20 April 2011

2nd of April Titanic Exhibition O2 London

On the 2nd of April a few members of both group 1 and 2 went to the Titanic Exhibition at the O2. The purpose of this visit was initially to study the recreations of the 1st and 3rd class cabins. The time period of the early 1900's was appropriate for group one's research for Fraz Kafka's Metamorphasis but the Titanic is around 30-40 years newer than the Tolstoy rooms we are recreating. On the other hand there are still elements of the 1st class interior design that harks back to the late 1800's and certain features or antiques are very similar. In general observing these room recreations are always useful for future projects, so we all took not of various elements such as the wood paneling, chairs tables and other furniture and mouldings. The photos below are of the 1st class cabin. There were not cameras allowed in the exhibition so these images I am using are from the official website http://www.titaniclondon.co.uk/ .


When viewing this room I took note of the types of wood used (or mimiced) The patterns on the upholstery and floors as well was very relevant to the baroque movement which we are currently studying. Dan and I discussed the fabric inlays in the walls possibly may be a good idea to have in the smaller study as this would 1 differ from the wall paper in the other room, 2 it makes the room darker and smaller in appearance. As well as the room replications there were many huge exhibition historic photographs of the original Titanic interior. These were also useful as references .


Tuesday 19 April 2011

Some Props I Borrowed or Purchased


When searching through some charity shops I found some pieces that would be appropriate for display on the completed whatnot including cut glass whisky decanter (£6.00), a small silver tray (£1.00) the tumblers are just to show size Rhyan will be locating some tumblers. The small cut glass bowl was £2.99, all have been cleaned and polished ready to use on the set.


I borrowed a small brass inkwell and a very old leather blotting pad for the writing desk from my Grandmother. The ink well has an eastern theme with the intricate patterns and designs which fits with the fashions of the time.


I also purchased a table runner (£3.50). Though it may be too long for the drawing room table it could be used as extra detail pleats in the drapery (with the tassels) or even just appropriate fabric for cushions etc.

Thursday 14 April 2011

Continuing construction 13th and 14th


The last two days have been very productive various sections of the furniture are well under way and the flats have finally been completed except painting two of them.


The corner heater that Fiona and Callum have undertaken has taken form in two sheets of 5mm MDF screwed together down a 90 degree spine. The heater eventually wil be covered in tiles. Made again from thinner MDF ( around thirty to one side of the heatre. The tiles are sanded down on the edges to create a rounded finish then were primed with covent garden primer then painted with a base coat of white emulsion ( many members of the group including myself participated in the painting and priming) Fiona is designing the pattern to paint upon the tiles over the Easter break and callum is continuing to base coat the tiles. The structure of the heater was a little wobbly so brackets were added across the back (wood cut with 45 degree angled ends) the screwed to the heater to strengthen the structure.


Other pieces of furniture that are continueing are Nicki's chair that has now almost been uphoulstered and due to be completed over Easter


With the delivery of the sheets of 5mm MDF Rob and I were able to mark out the sections of the screen onto the wood using the cardboard screen as a template. We elongated it by half a foot on the bottom to make it more of a feature in the now smaller study room. Two of each panel were cut out one solid one and one with a hollowed out centre to one make the screen thicker and sterdier also to be able to sandwich the fabric inlays between the wood. Rob Dan and I used a jigsaw to cut away the intricate curved outlines. We wore goggles and I tied my hair back as a safety precaution. Using the jigsaw was much easier than a band saw as the blade is much smaller and easier to control around the steep corners.


All of the sections of the screen are now cut out and after easter will be sanded and pieced together.


The last two flats were skinned then the rest had the mahogony effect painted on them. This was achieved by painting on the sienna as a base coat then using umber and black to paint streaks into this when wet. Then using a dry brush to smooth over this and blend together the layers.

Tuesday 12 April 2011

Our Whatnot Renovation


To begin with our £15 what not was in poor state covered in chips and scuffs with filthy glass and an interiour mirrored cabinet that was severly stained.


Step one was to clean it up, dusting, glass washed etc, then it was desided that we would remove the top flap door to open the piece up and make it more into a corner shelf (whatnot) then a closed in cabinet. The door was removed by unscrewing the hinges and the slide brackets. The mirrored panels were not repairable so those were then removed by also removing small screws and a thin wooden boarder. Once the mirrors had gone nice clean wood was opened up from beneath.


Further discusion led us to remove the other door taking out the original glass centre shelf and then using this as a template to cut a new MDF one to replace it.


We used car body filler to cover over the chips and cracks, this was set off by mixing it with a tiny bit of hardner. Once this was dry the next morning we sanded the filler to a smooth finish. Now we had to consider how to paint or finish the cabinet. We tried emulsion paint first but this failed as it was hard to blend the colour into the shiny veneer surface. We washed the paint off and decided that whatever we do the shiny surface had to go. Using a black and decker mouse sander we sanded down the surfaces of the whatnot, fully getting rid of the veneer. The filler was sanded away as much as possible. At this point we had a dilema. We really wanted to keep as much of the original wood graining as possible. We were daunted by the idea of stripping it completely and painting it from scratch using our little experience of wood painting effects. I also believed that as our finished set is for television and not stage the furiture would more likely be natural and not painted with emulsion (unless very skilled in this area of surface replication). This remained our plan B if our other experiments were in vain. Gaining some advice from someone who has worked with a lot of wooden furniture we decided that wood staining was worth a try. But we were advised not to use a wood stainer as it was more watery and would probably not work so well on the veneer, but instead use a wood varnish with a wood dye blended in. In Wickes we purchaced a can of this varnish in a dark oak tone as the mahogony was too red. The varnish was much thicker to apply and it covered and clung to the surface well. It tinted the areas of filler left and blended it well to the original whatnot colour. Yet it still let you see the mahogany streaks from the veneer through the gloss. The overal glossy finish made the piece look healthy and well care for, it is a beautiful rich colour and certainly looks much better than when we bought it. In total two layers of varnish were applied. The middle MDF shelf I painted with emulsion paints in burnt umber and burnt sienna to achieve the diagonal streaks of mahogony as on the other shelves. Once dried it also had a layer of the wood varnish and was placed in the cabinet. It is fantastic to know the effects of using the varnish are so successful as it avoided us having to completely paint the piece and possibly ruining it, it looks very authentic in its tones and use of the original wood graining. ( photos below of the final piece, middle shelf is the false one of MDF)


Next few days of construction


Some of the varoius activities that have been happening over the last two days of construction have been focused around completing the flats and beginning to think about paneling. The first ideas for paneling was to cut out plywood frames of 2 foot sqaure to apply to the wall ( the wall would be painted in faux mahogony up to 3ft off the floor meaning the frame would be centred into this to create the wood panels. In the photo to the left Dan and Fiona are using a router to create a template frame from leftover pices of the pine lengths. It was understood later that plywood is not easy to route as the various directions of grain means the wood fractures and tears so experiments are begining into using the larger router in the workshop on the cut offs of pine length in order to create our own mouldings/edges.


Another job for the router was to start leveling off the edges of the flats making sure the frames beneath are flush to the ply skin. When using the router it was important to wear a mask and goggles and a secondary person holding a vacumn cleaner as a form of extraction for the dust and plywood fragments.


Once the router work on the flats is completed then the lower 3 ft could be painted with the mahogony work. It was questioned whether the flats should have been artexed prior to painting to hide the under woodgrain of the plywood but because we are using it for wood panelling it seemed we got away with not artexing the surface.


Other members of the group began focusing on various pieces of furniture such as Nicki who repainted her desk chair and is now ready to star uphoulstering it. Callum began to make the large corner heater by fixing two large sheets of 5mm MDF together at a 90 degree corner bracket.


Rhyan and I began to renovate our whatnot....

Sunday 10 April 2011

Possible Rug

I have about three old rugs in my garage, as a group we decided obviously we didnt have the skill to make a rug and to buy one would be far to expensive. So we are to either locate or borrow one. Some other members of the group have rugs at home that we can borrow and this is the one I am bringing in to show the group. It measures at 4'8" x 3'4" making it a medium sized rectangular rug. The colours would be appropriate for the drawing room but possibly some of the colours like the blues and greens may not fit in but if the group dont like it then I will bring it back home.

Saturday 9 April 2011

Fabric for the inlays of the screen


The design of my screen includes the inlay of crimson velvet. As the room that the screen is in is goingto have a green colour range on the walls and furniture, crimson would not necessarily be best as this would contrast with the green and appear festive. So instead a darker shade of red possibly bergandy would be more appropriate. I have viewed many different types of velvet and faux velvet but in C and H fabrics today I found a beautiful dark crimson/burgandy velvet stretchy fabric, it has a subtle floral pattern blended into it that from a distance makes the fabric look aged and delicate but up close the floral pattern appears and so blends the fabric in with the traditional baroque richness, extravigent design. The price of the fabric was originally £9.99 a metre but the price was cut by 50% which made the purchase even better as part of our small budget. The photos below were taken with a flash so dont show the true colour.

Fabric Examples from C&H


After going into C& H fabrics today I took various pictures of upolstery and curtain fabric. These were from various different companies such as Morris and co and Jim Dickens. The prices were very expensive ranging from 24.99 -54.99 a metre, too much for our budget but these fabrics gave me references for baroque styles, colour schemes and patterns. Even though I personally am not designing or constructing the drapes I observed some display drapes in the store looking at the various fringings, fabrics and styles they came in. The picture below shows the consateener pleats that lay down the sides of baroque drapes they seem to be constructed from a quarter circle of fabric then layered over the top to create the disending pleats.


Construction of small props (embroidered picture)


One of the smaller props I wanted to construct for Ivans study is a picture depicting a quote from the novel. "Il faut que jeunesse se passe" is located in the second chapter of the book, translated from french to english it means Youth must have it's fling. I highlighted this in the book as a very important quote. It is Ivan's motto in life. It is very significant when deconstructed as the word fling means something that lasts a short period of time mirroring Ivan's own short life. Life for Ivan is mearly a fling, as his fling with youth ends his fling with death begins.


The picture would have the text embroidered with a traditional floral pattern surrounding it. Instead of taking a very long time embroidering from scratch I found an old embroidery in my attic around 50 years old so it had appropriate aging on the canvas. The photo above shows the embroidery with some various sized lace butterflies that I purchaced from a haberdashery they were originally cream but using a black fabric marker I coloured them black/dark grey (symbolising death through the black butterfly). The colours had faded a little from the original embroidered flowers and the colour shades were more pastel. I wanted the picture to be darker so used a fine line brown felt tip to add definition to the threads.


Buy typing out the phrase onto the computer in the Old Gothic typeface as printing it off I was able to arrange how the worrds would be on the canvas. Then using tracing paper the words were copied onto the canvas. Using a black fabric marker I drew onto the canvas to allow the black to show through under the stitching making the letters darker and clearer. Then using black embroidery silk I stitched over the letters to include them in the rest of the embroidery. The butterflies were stuck on the canvas with small dots of copydex fabric glue. The canvas was stretched over card and taped to the back. Black velvet ribbon purchased from C and H fabrics lined the card the picture sat on in the frame meaning it would them mount the sides.


The frame is a plain dark wood with a gold trim. This seems appropriate for the dark nature of the room it is placed within but until I show it to the rest of the group we will them decide whether it needs a more fancy gold baroque style frame. If this is so I can build ontop of this current frame with plaster or paper mache...


Wednesday 6 April 2011

Distribution of Construction


Sceen - Sarah/Rob Small Table - Heather/Lauren Chaise Longue - Nichole/Sarah Desk - Nuria/Chloe Desk Chair - Nicola/Kirby Bookshelf - Chloe/Dan Both Rooms Lighting - Rob/Kirby Curtains - Lauren/Nicole Doors - Fiona/Callum Windows - Jenny/Vicky Panelling - Dan Drawing Room Whatnot - buying this Sofa - Rhyan/Vicky Table - Abbie/Nicola Pouffe - Abbie/Steph Comfy Chair - Steph/Heather Cabinet - Nuria/Dan Chimney - Callum/Fiona Rug - Buying or borrowing this


The Whatnot

A few days ago Rhyan and I spotted an old whatnot/corner cabinate in the Shelter charity shop in Chatham for just £15. It wasn't authentic 1882 furniture but it gave us good foundations to build on or take away and modify. for £15 it seemed a good idea as we are on a budget of just£200 and the wood to make it would have most likely cost more than that. After listing out all the pieces of furniture that are needed to be made we all agreed that if we had some that were already mainly constructed and just needed 'tarting up' then it would save on time so Rhyan purchased the whatnot and we brought it up to the uni in her car.